Lifestyle Photography : Checking Out Pointers for Choosing the Best Photo Locations

Shooting portraits in a studio no longer have to be against plain backgrounds as digital cameras now allow the conversion and integration of analog photographs. 
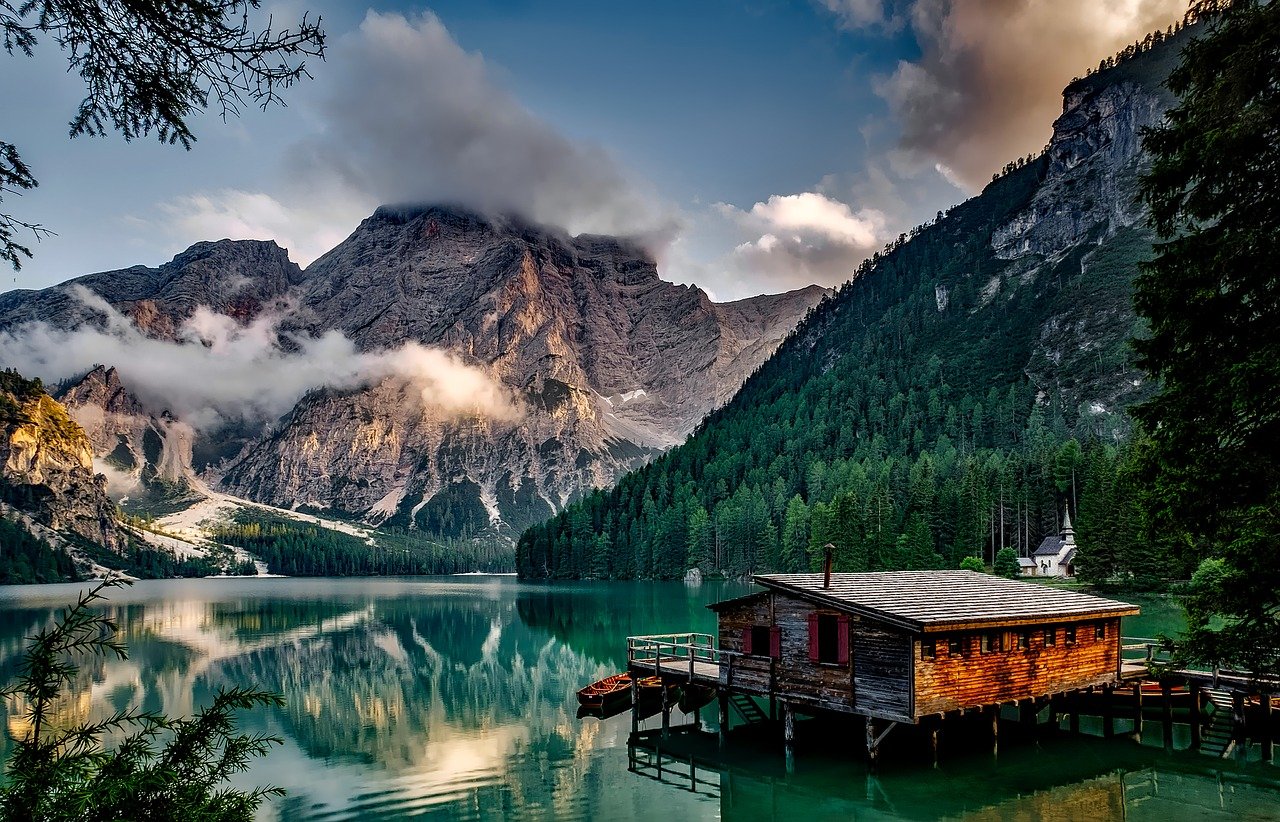
Although these types of photo shoots have been used a countless times, a photographer has to make different backgrounds more interesting. by choosing the most imaginative and unusual portrait location.

Location Shooting for Lifestyle Photography

Lately, lifestyle photography is fast becoming the preferred choice of having a more meaningful photograph; whether for announcing an engagement, for a wedding invitation, to document a personal event or for use in promoting a brand or product. Here, a professional photographer bears in mind that every customer is a unique subject. While some may choose studio portraits using a choice of digital background that match their personality, some would prefer having their image captured in a suitable natural location.

Benefits of Taking Photos in a Photography Location

Choosing a portrait location on the basis of convenience such as local park could be a tempting choice. Yet this tends to defeat the purpose of taking a portrait in natural location. As a type of lifestyle photography, shooting on location means placing your customer in places they love the most or in the surroundings where they can show off their best form, e.g. as a swimmer, a surfer, a cyclist, a mountain climber or any setting that gives depth to their personality as a photo subject.

The photography session will likely be easier for both the photographer and the subject as the latter will feel more relaxed in projecting the most natural-looking poses. In fashion photography, a photographer’s location decision will be influenced by the style of clothing or accessories since they are the main subjects, rather than the models who wear them. The purpose of taking photo shots in a location that match a street, active, formal or outdoor wear is to capture the best features of the products in their natural surroundings.

The choice of location will also drive other decisions such as the photography equipment, gears and props to bring. This also means the need to hire the services of companies that provide man with van as support crew. In any case that you find yourself engaged in a location shooting in London, we suggest for you to include What Man and Van offers as services in London.

Tips When Choosing a Photography Location

Photography experts who have lots of experience in choosing photography locations give advice to give careful considerations to the following:

Unless called for, avoid cities and crowded public places because of the constant interruptions caused by people moving in and out of frames. Not to mention that if you are doing portrait photography, your client will only be self-conscious about attracting the attention of curious passers-by.

Choose a location that has lots to offer in terms of natural lighting. Direct midday sunlight produces harsh shadows so make sure there are objects that diffuse or areas that offer diffused lighting for softer and more flattering lighting angles.

When location shooting in London, it would be best to choose an outdoor portrait location with sheltered areas like a cafe, a bandstand or even a bridge. There’s always a chance that London’s weather could spoil the shooting engagement. This is also why it’s important to have a man with van to back you up to make sure your equipment and props will stay dry.

Things About Video Game Photography

Technology always enables new forms of entertainment and hobbies. Who would have thought 15 years ago that many people would earn their money playing computer games live or giving beauty tips? With Photo Mode in many games like league of legends, in-game photography is slowly picking up speed.

Aside from in-game photography, you can also enjoy video games because of their numerous cheats. For instance, Eloboostleague offers lol duo boost to improve and help you enjoy your gaming experience.

Is in-game photography at all?

The artificial world itself is often part of the criticism. In gaming photography, you’re basically just photographing the art of others who created this world. But just turn the page. Is the real world created by the photographer? The motifs are usually created by nature or, in the case of cities, the built work of others, as in digital worlds.

Video game photography: Better on PC or console?

Basically, the answer to the platform question is the same as usual, it depends on what suits you more.

Advantages of the PC

There is a photo mode for games that don’t have it directly in the game.

Depending on the system, more impressive graphics (at least compared to PS4, Xbox One and Switch).

Better post-processing options.

Easier to move to cloud storage.

Using mods for numerous games.

Console Benefits

Always meets the graphic requirements.

Exclusive titles not available on PC.

Powerful Next Gen with fast SSD storage

Less susceptibility to errors

Although the PC has the edge, it assumes that you have good hardware. If you already have a powerful gaming computer, the choice is less difficult. You should also have a controller for PC, because the camera can often be moved a little more comfortably that way.

lol duo boost

In-game photography is a cheap hobby

If you have a powerful computer anyway, this hobby will cost you next to nothing. Of course you’re more likely to buy some games if they have a good photo mode on board, but often that goes hand in hand with games you’d get anyway. However, if you own a less powerful computer, you have to dig into your pocket for top quality. In general, however, it is also possible without high-end and especially on Instagram, a large part of the pictures even come from console players.

Packaging Photo Gear For Traveling

It’s not that easy to find the right camera equipment for trekking tours. Of course, you want to capture all the sunsets and rainbows and waterfalls and animal sightings as best as possible for yourself. However, factors such as weight, robustness or battery life play a much more important role if you use the camera for the whole day.

packaging specialists

An ideal camera for trekking and hiking should meet the following criteria

Low weight: Weight plays a key role. Especially on longer tours, several kilos can quickly add up. However, the less weight you carry around with you, the more fun you will have hiking and the more efficient you will be. Ultimately, of course, it is always a very personal decision as to how much image quality and flexibility you want to sacrifice.

Small pack size: The size of the camera and accessories also play an important role in trekking and hiking tours. Not only because they take up space in the backpack. But also because you always want to have the camera and at least the most important accessories as handy and quickly as possible.

A camera that is too large can quickly become limiting or at least annoying. This is especially true if you have to package it with waterproof material.

Robust housing and inner workings:  You should protect an ideal camera for trekking against splash water and dust. For this, packaging specialists will be of great help. They can help you get the packaging materials durable enough to protect your gadgets.

Carry the photo equipment in your hand luggage

Depending on the destination of your trip, there are different transport items for your photo equipment. It might be a shoulder bag on city trips, or a backpack when hiking.

It is important that you observe the maximum dimensions. Even if the checks are only random, you shouldn’t take chances.

Even more critical than the size of the hand luggage is the permissible maximum weight. If you are carrying a large amount of photographic equipment on a plane, you will inevitably have to contend with the carry-on weight limit.  Unlike checked baggage, there is usually no way to increase the weight limit for hand baggage at an additional cost. It is therefore advisable to think carefully in advance. Decide what must remain “on the person” in any case and what can possibly also go in the checked baggage.

Pro-Tips for Graphic Photography

Nearly 35 years of shooting the same kind of graphic photographs. The majority of style was developed and printed in the darkroom. Today, many are taking shot digitally, which has led to the discovery of some techniques that enhances the work. Here are a few considerations to make sure when taking graphic photos.

Shoot Your Edit

Long before you start editing, decide how you want your photo to look. Always take JPG and RAW photos. Utilize the camera’s JPG settings to make your JPG pictures resemble the final product.

Shoot Slowly

When everyone else is moving quickly, shoot slowly. Always try to accept everything as it comes, whether it’s a concert, a football game, or a street art chance. As the situation develops, make an effort to keep your desired impression in mind.

Make Use of Natural Light

Make it a habit to constantly observing the light, observing how it strikes a city street, and observing how long and thick the shadows are. Try to have the utmost endurance and to wait a long time for the lighting to strike precisely the correct position or for somebody to enter the appropriate space. Get a reliable app that tracks the sun and local weather. Plan the ideal shot by being aware of the light’s location and direction.

Windows 10 Photo Organizer: Is it Useful?

Windows 10 received a lot of praises and its share of criticisms since its launch. Independent tech websites like InverseGeek, TechCrunch, TechRadar, and others share in their content how to fix common Windows 10 Issues. Despite the many criticisms Windows 10 received, there are features that may have been overlooked that prove helpful in a lot of ways. One of these features is the Windows 10 Photo Organizer.

Windows 10 Photo Organizer for Personal use

When you’re storing photos on your pc, it is crucial to organize them so that you can easily find the photos you need for an occasion. Windows 10 has recently released its newest photo organizer called the “Windows 10 Photo Organizer,” which is a new app that is designed to help you quickly organize your photos from different photo sources.

In this short post, we will be discussing how to use a Windows 10 photo organizer for personal use. We will also be looking at some of the best features of these software programs and what they can do for you as well as their limitations.

A photo organizer can be used for a wide variety of things such as organizing your photos and uploading them to social media. Windows 10 photo organizers are designed to help you organize your photos by sorting them into different categories. They also provide you with the ability to share photos on social media and create slideshows.

Read also: Store Photos w/ Flexible Packaging

Windows 10 Photo Organizer: Benefits

Here are some benefits you will be able to enjoy by using these programs: You will be able to organize your photos in a way that is pleasing to you. You can also make them accessible and share them with friends. You will be able to find your photo files easily, especially when you need them urgently. It is easy to sort photos by date, location, or other criteria.

Windows 10 Photo Organizer: Best Features

Windows 10 Photo Organizer is a photo management and editing app that lets you upload your photos to various services, edit them, and organize them into different albums. You can also use it to upload your images directly to the cloud or retrieve them with a simple search.

Windows 10 Photo Organizer: Limitations

Windows 10 Photo Organizer is one of the best apps for creating images with text on them. The limitations of this app include the lack of a custom background and an inability to remove watermarks from captured images.

Conclusion: Windows 10 Photo Organizer: Is it Useful?

The latest version of the Windows 10 photo app introduces a new feature that allows users to aggregate the contents of their cameras into one easy-to-browse, easy to share, and edit location. Photographers appreciate how this tool helps manage their files. Photographer as a profession or not, Windows 10 photo organizer proves useful for any user.


Photographers: Social Media Rules

Many photographers shy away from social media. But if you can handle the mechanics and know how best to present yourself as a professional photographer, the platforms are a great way to maximize your reach.

Do’s on social media for photographers

Choose the relevant networks

Social media can be used as an extension of your website. So if you’re a professional photographer, Twitter might not be for you unless you’re extremely communicative and funny. Then you can of course tell us about your experiences.

Otherwise, Instagram or Pinterest might be an option for you. You have to decide for yourself whether Facebook is of great importance in the photographer’s landscape. Every business today should tend to have a Facebook account. You now need a sophisticated strategy for this because Facebook users are committed-tired and stingy with interactions. However, since you are only visible on the platform if you are relevant to your fans, this can be a tough job.

Stay Visible

In order to become and remain visible to your audience, you have to post regularly.  You should post high-quality content. It must stand out in some way from other images in your niche. The demands on Instagram, for example, are extremely high.

If you don’t manage to position yourself well here, you’ll only be one of more than 800 million monthly users. That sounds like a challenge and it actually is. Proven strategies for Instagram are now sophisticated and very extensive, as you have to pay attention to a lot.

buy cheap Instagram views

Interact with your audience

Social media is give and take. To get noticed and build a loyal community, you need to be engaged and like or comment on other users’ posts.

Bring traffic to your website

As indicated above, you should see social media as an extension of your website. There are millions of users here that you can target and boost your business. The more users you address with your work, the more traffic you generate. This leads to a better ranking and in the end, at best, gives you customers. For this reason, you should put a link to your website on each of your social accounts.

Collaborate with others

Also of great importance is that you work with other photographers and don’t see them as competition. No competitor will take anything away from you if you inspire yourself and ideally let others share in it. Appreciation is two-way, and chances are others will share your work as well. Ultimately, everyone benefits from working together. Who knows, you might even be able to expand your own network.

The Benefits of Photography for Your Small Business

You probably know that a photo is worth a thousand words, but do you know how a photograph can also be worth 1000 customers? Well, it’s all about the power of visual communication. The human brain can process images 60,000 times faster than text. That means that if you use images to advertise your business, your target audience will understand what you are offering and how your products or services will benefit them. Here’s why photography is beneficial for any small business and how it can help you stand out from the competition:

It helps Build Brand Recognition

When customers get familiar with your products or services, it is easier for them to buy from you again and refer their friends and colleagues to do the same. If your images tie back to your company name and product offerings, you can use them in multiple marketing channels to increase brand recognition.

When you want to use photography in your business, you first need to select a brand style. Ideally, you want your brand style to reflect your mission, values, and culture. For example, when your brand name is San Jose towing, then you want to show pictures of towing trucks.

It Increases Customer Awareness

Most consumers are visual learners.

They take in information visually and process it more effectively when there are images involved. When you use images in your marketing materials, you will help your customers to “get it” faster. They will understand your product or service more quickly, which can lead to increased customer awareness.

It Builds Trust among Consumers

You want customers to trust you. And, they can only trust you if they feel comfortable with your business. They need to know that they can depend on you and that you will hold up your end of the bargain.

When you are using images in your marketing materials, you can build trust among your customers by making sure that these images are consistent with your overall brand style. When your images are consistent, your customers will recognize them as your brand.

Customers want to know that you are reliable and that you are of high quality. Using images that are professional and consistent with your overall brand style will help to portray your company as a quality business.

Smart Budgeting Tips when Buying Photographic Equipment

Photography, as we all think, is not a cheap hobby or job to continue pursuing.

With the living cost continually rising, it is more crucial than ever to identify financing options while acquiring photographic equipment.

Helpful Tips on Saving Money when Buying Photographic Equipment 

Saving money on photography equipment can be done in a variety of ways.

1-Invest in used equipment.

Buying used equipment is one of the most efficient and promising ways to save money on photographic equipment. Buying used camera equipment via a specialized used camera company or straight from a private seller (through auction platforms like eBay) are the two most prevalent methods.

2-Know when is the right time for saving and when for spending. 

Knowing which pieces of equipment that can save money on and which you shouldn’t is a key to properly cutting costs on photography equipment. Camera bodies, in particular, lose value quickly due to wear and tear, shutter counts, and the constant release of new versions.

3-Rent or borrow equipment if necessary.

There are a number of factors to rent or borrow equipment, and it’s an alternative that many photographers overlook when shopping for new equipment. Renting photography equipment is a great way to sample before you buy, especially if you’re comparing a lot of various pieces of equipment.

Skills Required to become a Successful Photographer

Becoming a photographer isn’t as easy as snapping some photos and uploading them to Instagram or any other photo sharing platform.

How to become a Successful Photographer?

A lot of thought and practice is required before one can become an excellent photographer. Working as a professional photographer requires more than just the ability to take great images. Photographers need to understand the technical aspects of their craft, meet new people, manage their time effectively, build relationships with potential clients, and negotiate contracts. Not to mention, the fact that they need to find result based SEO agency Toronto who can help them in putting their work in front of the widest audience.

To be successful in photography, you need to have certain skills and attributes. Here are 3 essential skills required to become a successful photographer:

Good Eye for Photography

First and foremost, a photographer needs to have a good eye for photography. To be able to compose an image, and to capture the right moment, you need to have an eye for beauty and aesthetics. 

You need to have the ability to see what others may not notice. What distinguishes a professional photographer from an amateur photographer with a smartphone is the ability to see the world with fresh eyes. If you want to become a successful photographer, then you need to develop a good eye for photography.

Expertise in Photography Gears

If you want to become a successful photographer, then you need to be familiar with the photography gear that you use. You need to know when to use specific lenses, and when to use different flash units. You need to understand what impact different settings have on your images. 

Computer Skills

Another important skill required to become a successful photographer is the ability to use computer software. You need to know how to edit and retouch photos to correct any errors in color or exposure.

You need to be able to add text, watermarks, and logos to your images. You also need to be able to create photobooks and albums. In addition to this, good photographers understand how to use stock photo websites to make money from their work. Knowing how to use these programs will help you to manage your workflow, edit and prepare your images for printing, and create stunning photobooks.

Capturing Cycling Moments with Photography

A cycling photo is a photo of a cyclist taken while riding. It captures the movement, speed, and beauty of the sport. Cycling photography has become popular in recent years as more people are starting to ride bikes. There are even competitions that focus on capturing the best cycling photos from around the world.

Bike Mountain’s featured photos such as the gravel bike as a road bike was captured while taking into account the setting, the action, and the setting of the camera. With patience, taking the best photo for their feature became possible.

How to Capture the perfect Cycling Photo

A lot of people have been wondering how to capture the perfect cycling photo. Let’s explore what it takes to make a good cycling photo in action.

Lighting is the most important thing to consider when capturing a great photo. You need to know how much light you are going to be in and what kind of light you will be shooting in.

There are three types of light: natural, artificial, and mixed lighting. Natural light is the sun, mixed lighting is when both natural and artificial light is present, and artificial light is anything that does not include the sun. A good way to determine what type of lighting you will be shooting in is by looking at your surroundings or by looking at your camera’s settings.

How to capture moments in action such as cycling

Moments in action are the most popular photographic genre. It takes a lot of practice and patience to capture these moments in motion, but it’s worth it. This guide will show you how to take a picture like an expert photographer with minimal effort.

1. Find a good spot to start your shooting. You’ll want to choose a spot where you can easily see the main object of your interest, and where there is not too much light or too small of a space for the subject to be seen in the background. It’s best if you’re shooting the action in front of large, open areas.

2. Set up your camera and tripod as close to the action as possible. Move your camera and tripod so that they’re set up as close to the action you want to capture as possible, with a few feet of space on either side for maneuvering. Remember, this is important for catching the moment when all eyes are fixed on one object.

3. Adjust your camera settings for proper exposure and focus. This includes choosing the right aperture, shutter speed, ISO, and white balance settings. You don’t want overexposed whites in your photo, but you also don’t want underexposed blacks that might make it difficult to see what’s happening in the picture either

4. Find the right spot for your camera’s viewfinder. In this case, you’ll want to have the most unobstructed view of the photo possible. If your lens has a wide-angle or fisheye lens attached, you might have to stand back from the action a bit so that you can see everything in your frame from what’s closest to what’s furthest away.

Read also: How to Capture Powerful Marketing Photos

Conclusion: How to Take the Perfect Bike Photo

A picture is worth a thousand words, and the perfect bike photo is worth a million.

The best way to take the perfect bike photo is to consider what you want the photo to convey. What are you trying to show? If you’re capturing a beautiful moment with your partner, think about how much time you have at that moment and what kind of camera angle would work best. If you’re capturing a product launch, think about how many people are going to see it and what kind of background would be most impactful.

Once you have an idea of what your goal is, think about where you want the camera to be positioned. It will help if your subject isn’t moving too much while taking the photo – otherwise, it can make it difficult for you to focus. If you’re not sure how to get the right angle, it’s easier to use a tripod. Most tripods can be set up in seconds and they are generally very lightweight too. You might want to invest in one if you’re not comfortable being constantly adjusting your position whilst taking photos.

Helpful Strateies in Using Negative Fill

In photography, negative fill is used to enhance contrast to the image.

Photographers can use negative fill to add contrast to their photographs before they go through the post-production process. Negative fill is frequently used when the object has almost no contrast with the background, making it difficult to make them stand out.

So far, we’ve covered a lot of ground in terms of understanding what negative fill is. Now we can talk about how to make the most of it in photography.

Photographic Strategies in Using Negative Fill

Here are five techniques for using negative fill to have the look you want from your photos.

1-Use less damaging lightning to shoot images

Many photographers avoid taking images in harsh lighting because it presents various obstacles. To get the best results, you shoot using the right light.

Negative fill relies heavily on shutting away extra light, as clouds on a cloudy day naturally do. As a result, getting the appearance you desire from your photos will be much easier.

2-Make use of V-flats

V-flats are used by photographers to eliminate or intensify light; the boards resemble Vs, hence the name. You can choose between black and white versions, depending on your subject.

3-Try other light-blocking materials

If you don’t get a V-flat, you could indeed substitute other light-blocking materials. You can, for example, acquire a few cardboard boxes and arrange them for which you need them, though you’ll probably want to varnish them a specific color.

Store Photos w/ Flexible Packaging

Want to archive and protect your photos? You can properly store your photos to protect them from damage or yellowing. If you don’t want to do without hanging up your photos, photo frames are ideal.

Flexible packaging: Here’s how to store and preserve photos

You should never store photos in the basement or attic. Photo albums are also usually dangerous for your pictures. The most important factors for safe storage are:

  1. The container
  2. Humidity
  3. The temperature
  4. Acidity in the air
  5. The light exposure

Where should you store photos?

Only use protective packaging with the PAT (Photographic Activity Test) certificate for storing your photos. Depending on the size and number of photographs, the special archive boxes are available for an affordable price.

PAT certified boxes and photo albums are free from acids that will damage your photos. It is absolutely necessary to avoid inserts made of plastic, as the photos in them “sweat” and become damp. You need to go with flexible packaging so you can store your photos for a long time.

Flexible packaging: Pay attention to the following points when packing

  • Packaging with PAT certificate
  • No plastic inserts
  • No material made of polyethene and vinyl
  • Polypropylene and polyester materials are not harmful
  • No rubber bands or paperclips for fixation
  • Keep separate from other acidic reminders (newspaper articles, letters, etc.)

How high can the humidity be?flexible packaging

The ideal humidity is 30 percent. 45 percent humidity should also not be exceeded.

The higher the humidity, the softer the layer on your photos and pollutants can more easily damage the image. At over 60 percent humidity there is a risk of mould growth.

So basements are the wrong place to store your photos.

At what temperature should you store photos?

The ideal temperature at home is 15 degrees Celsius, with a maximum of 16 degrees Celsius. If you want to keep the pictures for several decades, you should store the photos at a constant two degrees Celsius. As a general rule, the cooler the room temperature, the longer the photos will last.

Also, avoid temperature fluctuations of more than two degrees.

If you have particularly valuable photos, you have to store them professionally in an archive and under perfect conditions.

Photography Club: Where Creativity Meets Community

Photography Club is a creative community that is aimed at building a space for photographers to share their work and learn from one another. The goal of a Photography Club is to create a space for photographers to share their work, learn from one another, and grow as creatives. With the use of club management software like Campai (mitglied werden), photography clubs are able to manage their members well and track the funds available for the group.

Photography Club’s Role in a Modern Creative World

A Photography Club is an organization composed of photographers who wanted to share their work and learn from one another. There are many photography clubs today that have grown into a community of over 60,000 people who are interested in photography. On Facebook alone, there are many photography groups that have been around for over six years, and it continues to grow each year.

A photography club is a group of people who share a passion for photography. They get together and discuss the latest trends in the world of photography, share their work with each other, and help each other improve their skills.

Photography clubs are also a great way to meet new people with similar interests. Photography clubs are not just limited to hobbyists but can also be used by professionals as well. These clubs can help them stay updated on the latest trends and know what equipment they should invest in next.

Benefits of Joining Photography Clubs that Involve the community

Photography clubs are a great way to get involved in the community and learn more about what is happening in your area. You can learn new skills, meet new people and explore different parts of your city.

A photography club is a group of people who meet regularly to discuss their love for photography. They may take pictures together, share tips on how to take better pictures, or just chat about what they do with their cameras. Photography clubs are a great way to get involved in the community and learn more about what is happening in your area. You can learn new skills, meet new people and explore different parts of your city. Photography clubs are an excellent place to find inspiration.

Most photography clubs offer monthly meetings that can be attended either in person or online. The group meets regularly to discuss, critique, and practice different aspects of photography.

The benefits of joining a photography club include the opportunity for feedback, the chance to learn new skills, and the opportunity to socialize with like-minded people. Some clubs also offer workshops or lectures from time to time which can be attended either in person or online.

Read also: Photography and Its Different Genres

Opportunities you can gain from Photography Clubs

There are also opportunities for members who want to be published in photography magazines. This can lead to a more lucrative career. Many people who are just starting out in photography find it difficult to make enough money to buy the gear they need. Through photography clubs, one can find an opportunity to earn with their creative photos and earn the money needed for new gear.

There is a wide variety of options available, and sometimes they involve photographers joining forces with other creative artists with different skills ( e.g. painters, musicians, authors) to make money together. For example, a group of photographers could take photos of people in a museum and then sell them as prints after the museum is closed for the day; or they could sell commissioned photos to people who are interested in having them taken professionally.

Conclusion and Call to Action for the Modern Photographer

The photography industry has changed over the years. It has become more competitive, and the demand for content has skyrocketed. Photographers are constantly looking for new ways to get ahead of their competition and capture the attention of their audience. Joining photography clubs is a great way to become competitive in the industry.

How to Capture Powerful Marketing Photos

Marketing photography is an essential part of any marketing campaign especially if you plan to submit it to websites for Advertising products. It helps in making the brand more appealing to the target audience and leaves a lasting impression on them.

The first step to getting good marketing photos is by doing your research and understanding the type of photos that you want for your campaign. Next, you need to find a photographer who can deliver the quality that you are looking for. You should also be clear about what kind of budget you have. You can also hire a professional photographer who can edit and retouch images too.

The Best Ways to Shoot a Product Photo

Photography is a powerful tool for marketers. It can show your product or service in the best light and create a memorable experience for your customers.

The best way to shoot a photograph is to have an idea of what you want to capture, and then work backward from there. For example, you might be shooting a product for marketing purposes, and want to capture the product in use. You might also be shooting a landscape with your camera to show off your location.

When capturing an image from above, it’s best to keep the horizon level and try not to include any distractions or lines that might make the viewer feel dizzy. Ideally, you should use an angle that doesn’t require the camera to be placed at eye level. An angle that makes the viewer feel as though they are “putting their head down” will often make the image more intriguing and creative.

Keep your camera close to your subject: When you’re shooting an image that shows a new product or service, keeping the camera in close proximity provides a better sense of intimacy for the viewer. If your audience is on the opposite end of the world, it’s best to keep the lens far from your subject so they can see it as clearly as possible.

The Dos and Don’ts of Photographing Your Product

In the world of marketing, the product photography is a vital component. It can be used to showcase products in a way that grabs the attention of potential customers and entices them to buy. However, there are some dos and don’ts when it comes to photographing your product.

Lighting

Do use natural lighting: Natural lighting will make your photos look more sleek, professional, and polished. It will also give your photos depth and dimension, which will make them more aesthetically pleasing.

Don’t overdo it: The more light you have, the fewer shadows you will have. The fewer shadows you will have, the more natural your photos will look. Too much light can make your photos too harsh and unflattering.#6: Set Up Your Studio With a Background to Mimic Natural Light

Background

Don’t photograph products on white backgrounds: White backgrounds can be a great way to create contrast for your photos but they can also create an unrealistic effect that might not represent the actual size or shape of the product accurately.

Don’t include an overly complex background: Complex backgrounds can be overwhelming and may make it difficult for customers to view the product.

Don’t fail to understand why you’re taking a photo: If the purpose of your photo is to show an effect, such as how a product might look in different lighting or various angles, then you’ll need to make sure that there’s no backlighting behind your subject.

Do create depth: You can create depth with props like flowers, plants, or candles. Place them behind your subject or on the side to mimic natural light. You can also take photos of your subjects from multiple angles for a more three-dimensional effect.

Get Creative With Your Photography

Don’t photograph people’s faces straight on: People’s faces tend to look more natural when photographed from the side or behind.

Do photograph things that make your subject look interesting: Try photographing flowers, plants, or candles from different angles to give your photo more depth.

Read also: Seven Elements of Art: A Way to A Perfect Photography

7 Techniques for Shooting the Perfect Types of Photos

1. Create a Vibrant Scene: If you want to create a vibrant scene, you can use natural light and add some artificial light to the background.

2. Include People: Including people in your photos is a great way to make them feel more alive and personal. As well as adding a sense of scale to your images.

3. Capture the Moment: Capturing the moment is crucial for any type of photography, but it’s especially important for blog photography because readers are typically looking for content that’s relevant and up-to-date with what’s happening in the world today.

4. Avoid Clichéd Shots: It’s easy to fall into the trap of taking photos that look like everyone else’s, but it’s important to try and avoid those shots. If you can avoid them, your blog will be able to stand out from the competition.

5. Turn Your Camera Around: Turning your camera around opens up opportunities for unique angles and perspectives in your photographs. You should definitely experiment with this technique a lot.

6. Use a Telephoto Lens: Using a telephoto lens gives you the ability to isolate your subject from the background and is perfect for capturing tight shots of groups or moments.

7. Experiment with Perspective: Perspective is an important aspect of photography, so it’s important to experiment with it often to get creative and unique shots that viewers will love.

A Brief Take on Roles Played by Photographers

The war in Ukraine has been dominating the news, Thanks to advancements in technology, genuine reports and not fake news are being brought to light. Unfortunately though, we are seeing countless civilians getting killed, while others have lost their homes. Millions have been fleeing and flocking to neighboring countries to avoid the blatant atrocities of Putin’s war crimes. Newsmen and photo journalists also fearlessly face the dangers alongside Ukranians defending their country. Sadly two of them have fallen and met their untimely demise. … Continue reading “A Brief Take on Roles Played by Photographers”

Seven Elements of Art: A Way to A Perfect Photography

Photography is a form of art, and our photos, like other art forms, are made up of seven essential parts. Understanding these components allows us to push our imagination to new heights.

Through that, we also need to have an idea about the elements of art that are highly crucial in making up photography.

Different Art Elements Essential for Photography

Here are the various elements of art that are needed to have good quality images:

1-LINES

Lines make up the majority of our images. It is used to help us navigate the image. Lines can also be used as blockers, preventing the viewer’s eye from moving past a given point.

2-SHAPES

An image’s significance can be determined by its shape. We can employ shapes for meaning in photography, just as painters and designers have done throughout history.

3-FORM

A three-dimensional shape is referred to as a form. We rely heavily on the nature of light and its capacity to both enlighten and cast shadows to convey shape within a two-dimensional photograph.

4-LIGHTNESS AND DARKNESS

This element is known as the value in art, but we commonly refer to it as luminosity in photography. Knowing how to play with this element will help us to know how to prevent blurs in photography.

5-COLOR

The intensity and saturation of colors might differ. Colors, like shapes, can have symbolic meanings that are sometimes contradictory.

6-SPACE

Positive and negative spaces are frequently arranged in a way that follows one of the many compositional rules in photography.

7-TEXTURE

We can imagine how an object feels in our mind’s eye based on its texture. Smooth surfaces reflect light uniformly, but rough roughness disperses reflected light. Matte surfaces exist in the space between the two.

The Best Camera Phones For Professional-Looking Photos – Which One Is For You?

Choosing the right camera phone for you could be a challenge. That’s some people rely on review sites like YouReviewIt. Non-bias consumer reviews are essential to help us decide on the right merchandise for our everyday needs, camera smartphones are not exempted.

What is a Camera Phone

A camera phone is a type of mobile phone that can take pictures, record videos, and send them to other phones. A camera phone is a type of mobile phone that can take pictures, record videos, and send them to other phones. It’s also called a camera phone or a smartphone with a camera. Camera phones are popular because they’re easy to use and affordable for most people.

What Makes A Photography Phone The Best One?

A photography phone is a device that has the ability to take high-quality photos. It has all the features of a smartphone and also includes the capability to take pictures, which makes it better than other devices in this category.

There are many factors that make a photography phone the best one. The most important ones are its camera and photo editing capabilities. A good camera will produce high-quality images, including those with low light levels and fast-moving objects. Photo editing tools allow you to edit your photos on your device or on your computer and share them with friends or upload them online for others to see.

Why Does It Matter That My Smartphone Has A Good Camera?

The camera on a smartphone is one of the most important features that you need to consider when buying a new phone. The camera quality on smartphones has been steadily improving over the years. The cameras are now at par with some of the best point-and-shoot cameras in the market.

A good camera on a smartphone can be used to take pictures of your children, pets, travels, or other important moments in your life. You can also use it as a backup camera for your DSLR or SLR if you’re an avid photographer.

The Importance of Having a Newer Phone for Taking Photos

The camera in our smartphones has become one of the most important features for many people. It is not just about having a good quality camera, but also about having a newer phone for taking photos. A study has shown that people are more likely to buy new phones with better cameras, and this is because they want to take better photos.

Read also: Things to Consider in Selecting a Tablet for Photo Editing

Best camera phones for photography 2022

  • Huawei P50 Pro.
  • iPhone 13 Pro (Max)
  • Xiaomi Mi 10 Pro.
  • Oppo Find X3 Pro.
  • OnePlus 9 Pro.
  • Google Pixel 6 Pro.
  • Huawei Mate 40 Pro.
  • Sonstige Highlights.
  • Xiaomi Mi 11 Ultra.
  • Vivo X60 Pro.
  • ASUS ZenFone 8 Flip.

Professional-Looking Photos – Which One Is For You?

Photos are an important part of every social media post. They can make or break the quality of your post.

That’s why regardless of the brand of phone that you have, the best camera phones for professional-looking photos are the ones that have a wide aperture because they allow more light to enter the lens and help produce better images.

So whether it is a selfie, a group shot, or a panoramic shot, you always want to have professional-looking photos all the time with your handy dandy camera smartphone.


Photography and Its Different Genres

The photography industry is enormous. Photographers have a plethora of options when lenses, cameras, accessories, and other related equipment are concerned. Yet, they should also have a plethora of genres in which to capture. Photographers frequently radiate toward genres that appeal to them for a variety of reasons or that feature subject that is meaningful to them.

While it’s common for a photographer to specialize in one or more genres. This is most likely true when generating professional work, dealing with many styles of photography is a fantastic way to broaden one’s understanding of the field and improve skill sets.

The Genres of Photography

Let’s have a look at the many types of photography and see some examples of each. There are many more types, but the majority of them may be categorized into one of these broad genres.

LANDSCAPE PHOTOGRAPHY

Landscape photography, which has been one of the most famous forms of photography for almost a century, entails taking shots of the natural world around us in a way that gives the viewer the feeling of being physically present there. The procedure is straightforward, enjoyable, and soothing.

FOOD PHOTOGRAPHY

In just recent years, food photography has become a genre as a result of several causes. These include the birth of mobile photography and the spread of social media as a form of advertising. However, many restaurants, coffee shops, pubs, and markets require high-quality images of food items for advertising purposes.

TRAVEL PHOTOGRAPHY

Exhilarating, rewarding, and exciting, travel photography ranks high on the list of ideal photography careers. Yet, it is not without its drawbacks and challenges.

The Ergonomic Benefits Of PC For Photo-Editing

Purchasing a brand new computer could be a tricky task. This is particularly true for those with less knowledge about computers as there are numerous brands and models to select from with varying costs.

Why a PC is Better Than a Laptop for Photo-Editing

The realm of computers can be a space wherein you can easily get bemused as well as lose track of your goals and at times even your budget. So, when buying a pc whether online or in-store, it is important and beneficial to know what you actually want and need in a pc as well as to know what your budget is.

Because of the internet, information is abundant making it easier for you to find details about the kind of pc that you need. Moreover, with e-commerce, shopping around for a computer that will meet your pc needs is made simpler and more convenient.

Atualcenter.com.br, for instance, offers a range of desktop computers. Many of their computers offer a level of performance and power. Going through their inventory, you may be bound to find a pc with the specs that you are looking for and that will agree with your budget. But, finding the right computer will still depend on what you intend to use it for.

For photographers, computers are used for photo-enhancing and editing. Although the best laptops offer the capability to edit photos whilst providing portability, a desktop computer is still an option preferred by many photographers when working at home.

While laptops can run photo-editing software, desktop computers provide more ergonomic advantages. One advantage is the size of the monitor where their size could range from about 21 inches to more than 30 inches making it far more comfortable for you to work. If you have the desk space in your home office, you can add a second monitor. Furthermore, with a mouse with a smooth movement and a full-scale keyboard, the ergonomic benefits of a desktop computer is even furthered over the trackpad and keyboard of a laptop.

For your photo-editing needs, a PC should have the capacity to handle and process high-resolution files without trouble, since you will almost certainly be working with photos with high resolutions. While a dedicated Graphics Processing Unit (GPU) is really helpful, it might not be enough for the needs of some, so make certain the GPU integrated in your PC is powerful enough, if not you can upgrade it. In many circumstances, it is not possible to upgrade the GPU integrated in laptops as you cannot remove it since it is attached to the motherboard permanently. This makes a desktop PC better than laptops.

How to Prevent Blurs in Photography?

sports-photo

Photography is a tricky skill to master. With so many variables, it can be difficult to produce the perfect shot every time. It’s easy to see why so many people are hesitant to take their first step into photography. However, with some helpful tips and tricks here in this article, you can become an expert photographer in no time!

Change the Focal Point of Your Photo

One of the easiest ways to prevent blur in your photos is to change the focal point. When you have a lot going on in the background, it can be tempting to focus on those elements. However, by shifting your focus from those distractions, you can prevent blur in your photos. Doing so will also make sure that objects in the foreground are clear and visible.

Keep Your Arms still

One of the first things you can do to prevent blur in your photos is to keep your arms still. Most people tend to jerk their arms around when taking pictures, but this has the potential to create blur. It may seem like a simple solution, but it’s often overlooked.

Use a Tripod

A tripod is your best friend in photography. You can use it to stabilize your shot and reduce blurs and camera shake. When you’re taking a picture, hold the camera as still as possible at eye level and keep your arms steady. Even if you have a feature on your camera that reduces blur, it’s always better to be safe than sorry.

Tripods are much more stable than hand-holding, so you’ll need to practice using one before attempting spur-of-the-moment shots without one. Tripods come in all shapes and sizes, so there’s one for every occasion! Some tripods also come with built-in self-timers, which will allow you to get in the photo too!

Get Closer to the Subject

Blur is more likely to occur when your subject is farther away from the camera. If you’re too far away, you’ll end up with a blurry image. The further away from an object you are, the more it will blur. If this happens, don’t worry! You can get closer to your subject and take another picture. This will reduce the chance of any blurs in your photo.

5 Tips for taking Sports Photos

sports-photo

Do you like to exercise, but don’t know how to capture it in a unique and fun way? With a little practice, you’ll learn how to capture creative shots that will help you relive the best moments of the game.

Here, five professional sports photographers share creative techniques and tips learned over the years in games and tournaments around the world. The basics of photography are the same for both Canon EOS 90D and Canon EOS 1D X Mark II.

1. Zoom in on a Unique Image

Getty Images photographer Mark Colve captured this image with a ping-pong ball that appears to float above the player’s head. He tells the story behind the shot: “I took this shot for Getty Images The first time I shot table tennis. I knew that the pictures of the players serving were always popular, so I wanted an athlete with a weird serving technique.

I’ve been looking for advice on how to recreate the strange framing of the
mark: “When zooming in, focus on the action and plan as much as possible in advance. Then you’re the perfect moment. With a zoom lens, you often get tempted to zoom in and out many times and get out of focus at a critical moment. You have a better chance of capturing the moment if you have a little patience: first set the focal length and then wait for the image you were hoping for.


2. Freezing important moments

Photojournalist Elizabeth Kreutz took the picture of the boxers in the middle of a fight with her Canon. She says that freezing the action at the right moment should be considered a useful learning task. “On this shot of Manny Pacquiao and Timothy Bradley Jr., I used the Canon EF 70200mm f / 2.8L IS III USM lens to get up close and capture the drama and force of the hard blow.

It is important that Elizabeth is “always ready” to freeze such movements. It was also helpful to set the camera to shoot continuously in advance. “Select time preselection and automatic shutter speed preselection with an exposure time of less than 1/1000 second. Also, for continuous shooting, the camera must be set to the maximum frame rate.” Canon EOS90D It can take up to 10 frames per second, so there is a good chance that you will get the best image.


3. Be Creative with Motion Blur

Former Canon Ambassador Tom Jenkins is a British Guardian and Observer sports photographer. As you can see in the picture above, it’s a good idea to try motion blur to get a sense of speed and a busy pace. “I took this picture of the men’s 1500m qualifying round for the Guardian,” he says. “This race wasn’t really great, so I decided to try a combination of long exposures and several different exposure shots. I visualized the movements of the runners and devised the colors of the stadium shirts, shorts, shoes, and scoreboards. After several attempts at different shooting positions and exposure times, I got the shot I wanted and panned the camera with the runner as I passed by.


4. Taking Pictures in Unexpected Positions

British Press Photographer Marc is a senior sports photographer at The Times, one of the UK’s largest daily newspapers. He is also a Canon Ambassador who likes to install Canon equipment in strategically interesting places, such as horse races or car racing, cars like the Honda SUV Hybrid, to gain different perspectives. “This particular photo was taken with a remote control camera from about 18 meters away. I placed a camera with a transmitter under the gate and confirmed that the photo had a finish line.


5. New Include an environment for creating dimensions

“Imagine a creative way to look at the environment you’re shooting and tell a story visually. For example, in the case of the camera’s display pane: Try taking a picture from an unusual angle, flying overhead, in the crowd, or on the sidewalk. Including reflections like this puddle is another great trick. Whether you’re in a car or building, look for water and shiny windows, even with sunglasses. Then, the more you practice, the better your photos will be. ”

Strategic Ways of Selling Photographic Prints

A form of art that should not be enclosed inside a computer’s gallery, it is what photography really means.

The sale of photo prints usually results to a large amount of revenue of a photographer. In connection to this, they also shows their skills and professionalism. Aside from that, these print outs remind your client about you and your services. That way, your clients may potentially reach you out for their next photo requirement.

How to Strategically Sell Photo Print-outs

Below are some helpful ways on how you can effectively sell your photos.

1-Plant before you reap

Let your clients see your finished photos. Make your product quality one of the biggest contributor of your selling point.

2-Present your output

Allow your client to see your work output by showing them how it has been used in their everyday living. Other tip is to make a gallery of your work memories.

3-Establish your selling technique

Selling photo print-outs varies from one photographers to another. It actually depends on their niche and particular client base. So, better to analyse the best strategy that creates the great sense for your photography business.

4-Look for the source of your print-outs

Search the market for an easy-to-use e-commerce platform. Keep in mind that convenience must be the primary factor for this aspect of your business.

Why is SEO important to photographers?

Photographers’ websites, just like any other website need SEO to become visible on the web. Without SEO, your website is just a photo catalog. If you want to rank better, you need to put SEO above your artistic soul. You need to help search engines understand what your pages are about. For this, you need as many pages as possible, of course with photos, but also with texts.

Read also: STRATEGIC WAYS OF SELLING PHOTOGRAPHIC PRINTS

SEO Mistakes Photographers Should Avoid

1) No or wrong keyword research. The so-called “keywords” are your key to economically relevant positions in the search engines! Potential customers google, for example, with the keyword combination “ wedding photographer Munich ” when they – who would have thought it – are looking for a wedding photographer in Munich.

2) Too short or too long meta titles and descriptions. Meta Titles and Descriptions are the most important information about your website in search engines! Unfortunately, many photographers do not enter titles and descriptions at all! Or they choose the wrong text lengths. A title should be a maximum of 55 characters long, otherwise, it could be “cut off” by Google in the display.

Also, be sure to include the keyword you want to use to rank well on Google for that page. A good meta description is a maximum of 156 characters long and also contains important keywords. Please don’t just enter keywords in the description! A good description is informative and tells the clicker what to expect on your website.

3) Missing or inconsistent headings. The first heading on your website should always be marked with so-called “ h1 ” tags. This “h1” heading tells the reader (and search engines) what the page is about.

The most important keyword must be placed in the first headline! So if you want to rank for “wedding photographer Munich” (phew..that’s going to be difficult), then this keyword combination should also appear in the headline.

Important rule: Only one h1 heading per page! The next heading then gets an “ h2 ” tag and then follows “h3” etc. Also, pay attention to the order of the headings! h2 should not come before h1!

4) Too little text and no blog. SEO lives from good texts! A good text offers your reader added value and always contains the keywords for which you want to rank. But please don’t bombard everything with keywords! Just think about the reader (“and always think about the reader”) and how best to inform them!

We really recommend every photographer to start a blog! Your blog is a true marketing machine and will bring you the most traffic through Google! Why? Because you can perfectly optimize your blog articles for longer keyword combinations!

5) No Image SEO. The topic of “image SEO” is of fundamental importance for photographers! Let’s talk about what Image SEO is. For those who are not familiar with the topic, I will quickly explain what Image SEO is. When people engage in image search engine optimization (SEO), they only take the low-hanging fruits: load time optimization and alt text. Image SEO is real science and goes way beyond that.

So, what is Image SEO? Image SEO is the practice of optimizing your images for search engines. It doesn’t just affect the placement of your images in Google images. It also affects your organic search potential as a whole.

6) Lack of internal linking. Internal linking? Yes – this is also very important for your website! An internal link refers to a subpage of your website with further information.

The more internal links refer to a subpage, the more important this page is. Google also sees it that way and will therefore always check whether a page is “important” when assigning positions.

7) Bad page speed (high loading times). The longer your website loads, the lower it will be listed on Google! Okay..that may be a bit exaggerated – but there is still a lot of truth in this statement!

Google measures how long a webpage takes to load, as this is a quality factor! Which user likes to wait for content? So from now on, you should do everything you can to speed up your website!

8) No backlink building. A backlink is a link from another site that points to your website. The more links you get from other websites, the more Google will notice you and place you at the top. The topic of backlinks is huge and will only be touched on briefly in this article. Just this:

There are “good” and “bad” backlinks. You don’t buy links and the easiest way to get them is through good blog articles or good friends in the industry. Get the help of professionals in backlinking – link building service from Outreachmonks

9) No mobile optimization. Is your website easy to read on mobile phones and tablets? No?! Then you should change that as soon as possible! Google recently released an update that downgrades non-responsive websites!

10) Over-optimization. Now take a deep breath and think about how you want to implement our tips. Please don’t overshoot the mark in the “SEO for photographers” section!

Don’t bombard your website with keywords and don’t buy backlinks! Think of your readers and your potential future customers. And especially how you can give them a good experience on your website.

Things to Consider in Selecting a Tablet for Photo Editing

Just like any other product, looking for a tablet that you can use to edit photos also requires some factors for considerations. This is generally a big help if your goal is to use the device in a professional aspect. Primarily, choosing a tablet requires you to consider the platform first. In case you already have a preferred photo editor in mind, you’ll have to check it so that you will guarantee that it works well with your platform.

Aside from that, here are the other details that you need to consider if you want to look for the best tablet that may help you in your photo editing activity:

1-Screen Display

Basically, color corrections in the images are needed so that the accuracy of the photo may be seen on the screen. Check on the tablet’s color gamut display. Remember that if it is wider, then it is far better. Also, don’t forget to check the brightness and the contrast ratio.

2-Processing Power

Editing photos generally need a lot of power. This is more likely true if you want to work out images that will give quality prints.

3-Storage

Keep in mind that high-resolution photos may consume a lot of space in your device. That’s why it is really crucial to check if the tablet has enough hard drive or has expandable storage through a microSD card.

Exciting Simple Photo Effects: The Right Light

For beginners, here’s how special effects can be achieved quickly and easily. Your photos will be real eye-catchers.

It’s finding the right light and the perfect spot

The right light is essential for a perfect portrait photo. Because only with the right light can a certain mood be created – dramatic or light, high-contrast or moody. So start every shoot by looking for the best possible lighting conditions.

Optimal light source: daylight

Natural daylight is always my favorite light source. For a perfect beauty portrait, I recommend a well-lit place with soft light.

See places with different eyes

You can recognize such spots quickly if you look at your selected shooting location with half-closed eyes (blurred view). Or – if you can focus your lens manually – go into the blur with the focus. In this way, you can see the best spots of light directly.

The formula for a perfect portrait

3 x L is my magic formula for a perfect portrait photo – light, location, and love.

Soft Light versus Hard Light

Soft light is better than hard light for beauty portraits, as it has the same effect as a soft-focus filter: the skin appears smoother, dark circles are reduced and imperfections are concealed. Do not place the model indirect light or in direct sun.

Use a softbox to help soften the light

There are of course aids to softening the light. For example through a softbox. This is a photo accessory that is used to evenly illuminate subjects. It breaks up the light and thereby makes it softer. But you can also achieve this effect naturally – for example with clouds, which also break the sunlight. Or do you happen to have white curtains on the windows at home that let the light through? Jackpot! You can also use this as your personal softbox.

Hard light in turn gives a portrait photo more drama. When it comes to highlighting a person’s personality, you may be able to tease out certain traits with this light. To do this, place your model in direct sunlight because you can play with light and shadow.

Note: If the light is too strong, this setup can make it uncomfortable for your model and cause them to squint.

Avoid the midday sun

If you take photos outside, be sure to avoid the blazing midday sun. Because that is tough light that comes from high above. This ensures that the eyes (sockets) lack light from the front. And for me the eyes are an important factor for a beautiful portrait, after all, they are the gateway to the soul. Better: Look for partial shade – roofs, overhangs, trees, balconies or house entrances that block the light from above. Alternatively, you can just wait a little while until the sun is lower.